Showing posts with label ornaments. Show all posts

Thursday, February 27, 2014

More Belated Christmas - Diorama Ornaments & TUTORIAL

This blog is overdue.  In January I wanted to update my blog with some Christmas gifts I received and also some I made.  But, a grandbaby, miniature event and several other things have pushed this out so now I am getting it done (diorama ornaments follow below).

Christmas gifts from my sweet daughters:
Mixer from Chelsie & Brad
Ceramic vase from Cara (age 17)

My gifts to both of them were ornaments with scenes inside.  I was inspired by a friend who had shown me some she had made.  she had put cute quarter inch scale Christmas scenes inside a full size ornament:
Charlotte Serrold's Christmas Ornament

 So Charlotte inspired me to make some.   Here are the ones I made my girls.  They are not very traditional in colors but I made them to fit their tastes:
Chelsie's Ornament front
Chelsie's Ornament back
Chelsie's ornament has little dolls representing her (pregnant) self and her husband, Brad.  Also quarter inch scale cat and dog just like their own pets.  I reproduced her Christmas wreath and (loosely) the Christmas stockings Brad's mother made them.  The back of the ornament has a decoupaged scene cut from an old Christmas card.

Cara's ornament front
Cara's ornament side view
Cara's ornament in one of her favorite colors (purple) depicts her doing her favorite thing - sitting with a fire and a blanket with one cat on her lap and the other at her feet.  She also loves nutcrackers so I included a tiny one by the fireplace.

HERE'S THE TUTORIAL PART:


These ornaments were fun to make so I will just briefly tell how I decorated and filled them.  The papier mache ornaments were from Hobby Lobby.  I cut an opening in them.  The double round one was actually plastic underneath the paper mache so a little harder to cut.

I painted the inside with Gesso then two colors of glitter.  I cut a piece of foam core to make a base for the furniture to sit on.
The little figures were just pipe cleaner wrapped with silk ribbon and painted.  I used a small bead for the pregnant belly.

I used scraps of fabric to dress the 'dolls'.  Really just wrapped the arms and legs for sleeves and pants then cut tiny slits in another piece and worked it over the sleeves for the shirt.  Seams were glued down the back.

The sofa and chair were from a kit from Karen Benson


The little figures and chairs.  Quarter inch scale is not my specialty!


Here is a closer look at one of them.

These were fun to make.  I really want to do some more next year.  Hope you are inspired to try some too!

Friday, August 9, 2013

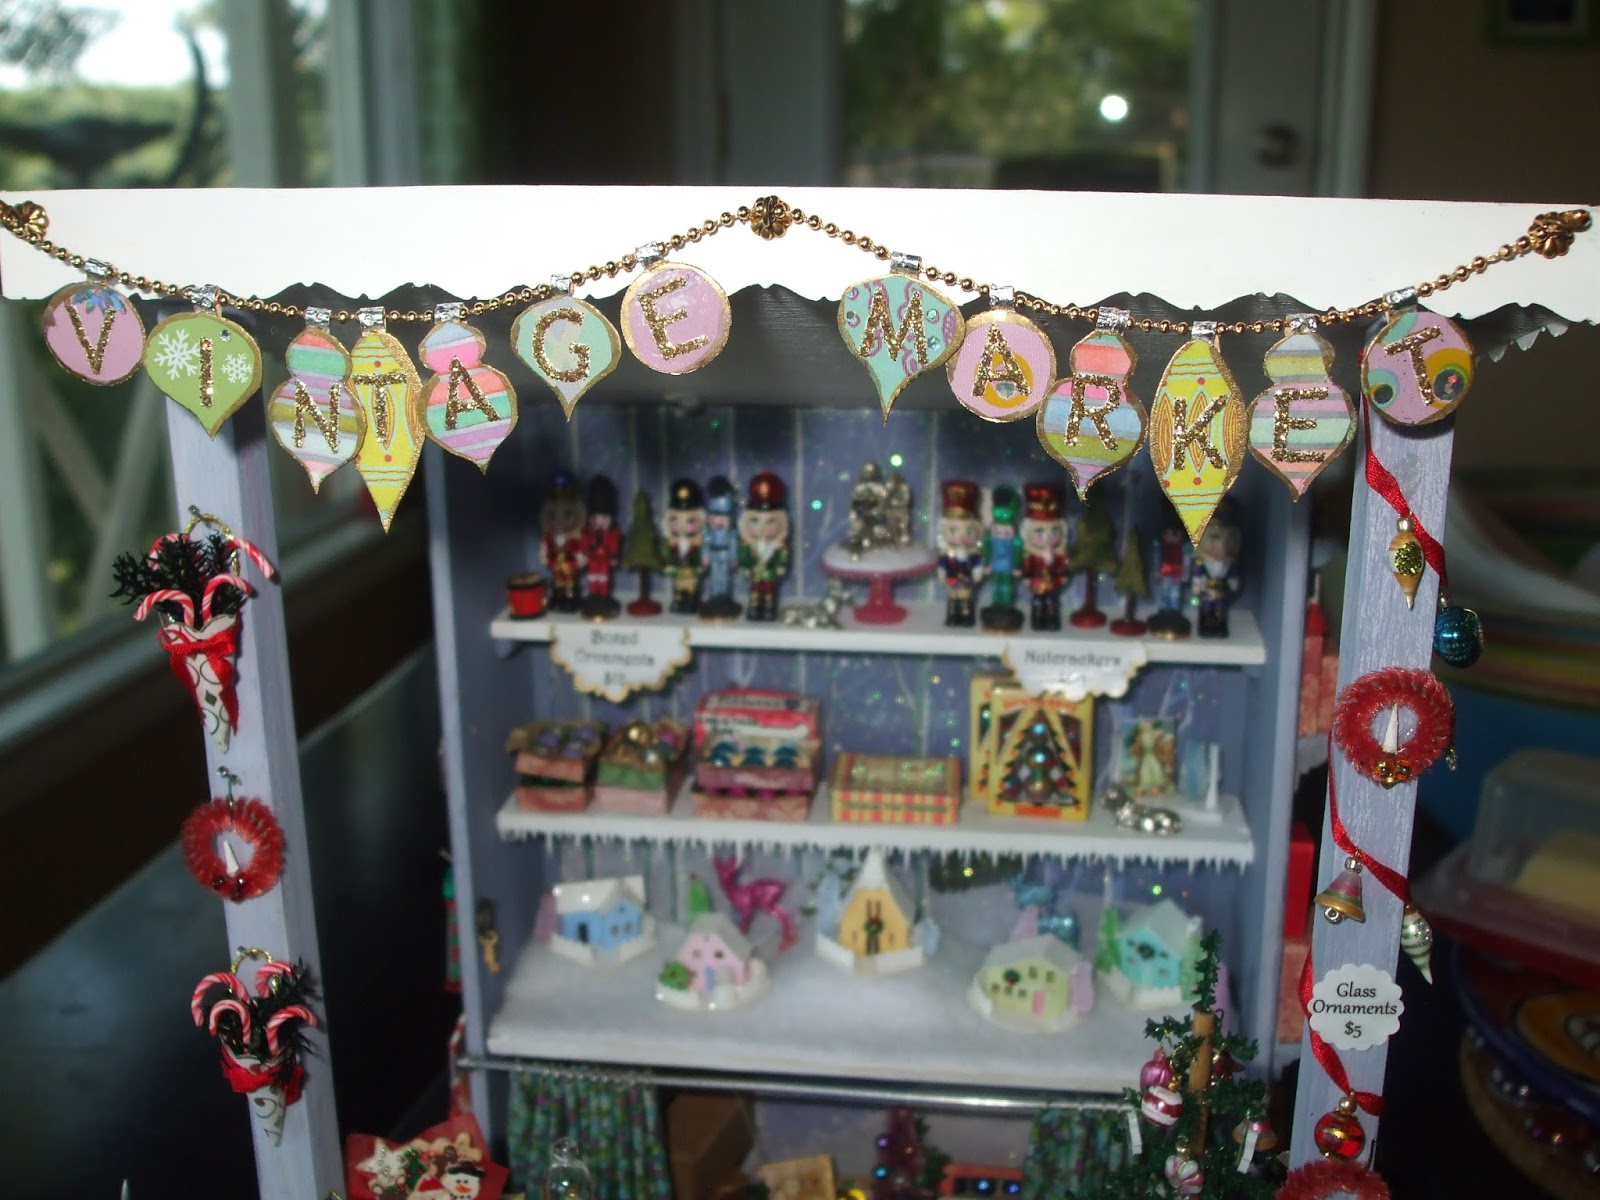
Vintage Market Stall - Ornament Garland

It’s been a long time since I’ve updated this.  The stall has been completed and was exhibited at Texas Miniature Showcase in Dallas, May 2013.  Here are some more photos and “How-tos” for some of the decorations.

I needed a sign for my market stall.  I wanted something that didn’t look manufactured (like it came from those ‘Dept 56’ Christmas Villages).  I decided on a hanging garland of vintage looking ornaments – just card cutouts.


Most of the supplies used: index card, scraps of Christmas wrap, some tiny gold bead garland (you can find this on Ebay), gold scrapbook letters, snowflake nail stickers, a half inch circle paper punch.  Plus your basic tools (scissors, X-acto knife, Crafter’s Ultimate glue.


I sketched the shapes and sizes I wanted to use and compared them to the letter stickers to make sure the stickers would fit.  I cut the shapes first out of a folded piece of paper as a pattern.   I glued gift wrap to index card (on both sides).  I then cut ornament shapes from the double sided index card. I used a small ½” paper punch for the round ornament.  The others were cut using patterns.

I used tiny strips cut from silver paper doily on the tops of the ornaments to attach them to the  beaded garland (also served as an ornament cap).  When I attached the ornaments, I didn’t actually glue them to the garland, instead I glued the strip of silver to the back of the ornament.  I wanted them to swing freely and to be able to adjust how close they were to each other.


To attach the letters, I had to use an X-acto to position them.  I also had to darken the glitter letters a little because they didn’t show very well.  I just used a little diluted brown paint.

I attached the sign (garland) by drilling small holes and threading the plastic bead garland through eye pins pushed through a bead cap into the holes.

Finished Garland sign.    Next time some of the candy!

Thursday, March 21, 2013

TUTORIAL Vintage Ornament Wreath

Supplies:
  • 8mm, 6mm and 4mm round colored pearl beads (plus a few very tiny ones)
  • textured ‘foil’ like beads, same sizes (Hobby Lobby brand “In Bloom")
  • gold beads oval shaped about the size of a grain of rice (I cut these off an old necklace but they are sold in craft stores)
  • 34 gauge brass wire and tiny gold seed beads for ornament caps and rings
  • ULTRAFINE glitter, gold, silver and various colors to match the beads and cover the bead holes
  • Crafter’s Pick ‘Ultimate’ glue (my favorite) put in a bottle with a tiny dispensing hole

I think it looks best when you use a variety of sizes and shapes (oval ‘rice’ beads, fluted beads). I didn’t start with finished ornaments – I made the basic wreath of plain beads then added the bead caps and rings to some of the beads after the wreath was done. This way I only put them in a few places and didn’t waste the work of making the wreath from all finished ornaments.

 
Draw a 1-1/4 inch circle on index card and place it under a sheet of wax paper


Select 12-14 beads (8mm) and see if they fit on the circle. Fill the holes with glitter to match the bead color.


Place beads around to get colors where you want them.


Glue them down. This is your first layer.


Select some smaller beads for the 2nd (right) and 3rd (left) layers.

Use a few very tiny pearls to fill in some of the bigger spaces when you're done (you'll see what I mean)

Note: some of the silver beads in pic above were metal spacers that I added glitter to. Bead spacers come in many shapes and sizes and even ridged or fluted styles that look very vintage! I also added glue & glitter to both ends of the rice shaped beads and sort of squished them to a point when they got a little dryer (to make an ornament that looks pointed on both ends).

Glue the second layer to the wax paper just inside the first layer.


Final (3rd) layer goes on top, arranging them so they look best for color, shape, etc.

Before all the glue is dry, make a few ornament rings from the wire and beads (see my Shiny Brite Tutorial, Sept. 2012). Fill in some of the bead holes with these rings.

Here is a photo of some other ornament wreaths I made in other color combinations:


Have fun making wreaths! Great way to use up your bead stash.

Wednesday, September 19, 2012

TUTORIAL Shiny Brite Vintage Style Christmas Ornaments


These are some ornaments I made to go into a NAME Day project - a Market Stall.  Here is how I made them:


Start with cheap-o plastic beads from Hobby Lobby.  These look sort of like crinkled foil but when you add glitter they look like glitter ornaments.  Also I used a couple of plain colored pearl beads to look like the "Shiny Brite" brand vintage ornaments.


 Ornament hangers: To make the hanger and bead cap,


Cut a piece of 34 gauge wire about 6 inches long.  With about ¾” tail, hold the tail and wrap the wire twice around the shaft of a 2 inch long T-pin (this type of pin makes a nicely scaled ring).  This will be the tiny ring of the ornament.

Now grasp both the wires with a needlenose plier.  Holding both wires about ½ inch from the pin, begin twisting the pin about 10 times.

Twist tightly right up to the pin making a tiny round circle of wire around the pin.

With wire cutters, cut the twist leaving about ½ inch of twisted wire (or a little shorter is OK – you’ll decide how short future ones need to be after you’ve made a few ornaments).  Make several of these at once to save time.
Bead caps: I made tiny bead caps from flower shaped glitter, these tiny flowers were about 4mm across when flat.  To cup them and put a hole in the center use a corsage pin and piece of thick craft foam (about ¼ inch thick).  Poke the corsage pin through the center of the flower and slide the flower up and down the pin so the hole will be big enough to put the twisted wire from the hanger through.  To paint them gold, set a few of them on a strip of double stick tape on an index card.  Use a gold paint pen to paint them.  When dry, scrape them off the tape. (On some ornaments I didn’t use the bead cap, only the seed bead and circle wire hanger.)


Assembling the Ornaments:


Plain glass with bead cap – use the prettiest beads with a design on them already so all they need is a cap and hanger.  I found some glass beads with a swirled design in gold at Hobby Lobby.  Take a hanger (twisted wire with circle at top) and thread the wire through a gold seed bead then through one of the cupped flower shaped caps.  Put a blob of super or jewelry glue on the bead hole then push the wire through.  Trim any wire extending through the other end of the hole.
ON left are textured beads.  On right are pearl bead ornaments.  Both have glitter added.
Glitter decorated – hold a pearl or other plain bead on the tip of a toothpick.  Push it on so it doesn’t turn.  Place a small amount of glitter in a small cup or tray.  With your fine point glue applicator, make fine dots all around the bead then gently touch the dots into the glitter.  For stripes or lines, similarly draw the glue in a line down from the top of the bead and dust it in the glitter.  Set the toothpicks into a paper cup to let the glitter dry then blow off excess (neat tip is to use a dry paintbrush to brush the excess glitter from the glued area.  Add bead cap and ornament hanger as instructed above.
Cover Bead Holes – use glitter in similar color to the bead to cover over the bead holes that show when ornament is done.  I noticed the textured beads have really big holes.