Showing posts with label NAME Day. Show all posts

Monday, June 28, 2021

NAME Window Shopping and Decoupaged Palace Chest

A few years back, NAME (National Association of Miniature Enthusists if you haven't heard of it) had a NAME Day project called Window Shopping.  It was a small display with lots of shelves to display a grouping of minis like they were in a shop window.  Ingenious! 

NAME Window Shopping Prototype from Gazette July 2015

I LOVED seeing all the examples of this project sent in by Gazette readers and was so jealous of their lovely displays.  Hats and wood-turned vases, and every kind of subject.  When my club did our orders, I selected a kit in walnut from Tom Walden.  It was beautiful! But then I had a problem – the lovely walnut was so dark that many items were just lost against it.  I didn’t want to paint it.  So I decided to display light colored things – PINK!

So I gathered together my most favorite pink minis and tried to come up with a pleasing arrangement.  They looked great against the dark walnut.  (Scroll down to the end for the artisans of the minis I put in my display.)  I used shaped brackets for the wall shelves instead of the simpler column provided and I didn't use the platform that came with the kit because I needed some height to display the chest and painting on top.


The Decoupaged Chest

In case you didn’t recognize it (if you are not a Baby Boomer!) the pink toile chest is just the Petite Princess Palace Chest with wallpaper applied to the drawers.  Petite Princess items are actually a little smaller than 1:12 scale but I still think they can work in 1:12 miniature scenes.  What I like about this chest is 1) the faux marble top and 2) the serpentine drawer fronts.  Those serpentine drawer fronts would be SOOOooo hard to reproduce in miniature!  But disguised plastic can look great!

I accented some of the edges and the pulls with acrylic gold paint.  When I had my drawer front pattern made (with markings for where to punch holes for the knobs) I just cut them from wallpaper so the design continued down the front so the drawers matched up.

After gluing the wallpaper on using Crafter’s Pick Ultimate glue, I let it all dry then antiqued it with a faint wash of Burnt Umber acrylic watered down and just brushed over here and there.  Then I finished with a water based acrylic varnish.

Here is another one I did in green (below).  On this one I filed down the top two pulls and instead, put a tassel in the center of the top drawer.

If you have the opportunity to find one of these Window Shopping kits, snap it up!  Sometimes the kit cutters (see recent NAME Gazette) have leftover kits.  I loved this project because it was small, not intimidating to complete, viewable up close, could be protected using a piece of glass and wall hung!  It checks all the boxes for mini displays!  Its a great way to display minis with painted details where they can be viewed up close!  In a dollhouse, these details, like painted dishes, tatting and pins in a pincushion would be almost invisible.

If you are not a NAME member, I highly recommend joining!  NAME is a wonderful organization dedicated to the education and support of the miniatures hobby.  Every year there is a "NAME Day" project and they are all very nice.

See below for the artisans of the minis I displayed in my Window Shopping display:

Clockwise from top of chest: (right click photo to open larger)

Painting - Josephine Meyer
Staffordshire dogs -  Metal Minis (painted by myself)
Rose glass candlesticks - Phil Grenyer
Urn jar - Jean Tag
pink lotus flowers in white bonsai dish - Small Time Operators
Tea cup, with pink flowers - unknown artist
pink lotus bowl - Deborah McKnight
pink, green lotus plate - Amanda Skinner
Cat Doll (on pillow by myself) - Ethel Hicks
Painted coffee set - Amanda Skinner
Framed tatted doily - Julie Felzien
shoes - Doll's Cobbler
Stool with petit point - Bespaq with Petit Point designed by Lucy Iducovich
hydrangea - Laura Crain
Bowl, oval scalloped bowl - unknown artist
Painting - Josephine Meyer
Porcelain pin cushion - Patty Caster (kit)

 That's all for this month.  Thanks for visiting!


Friday, September 20, 2013

Christmas Market Stall FINISHED!!

My market stall was a project from a NAME Day held in Saginaw, TX in July 2012 hosted by the Mini Endeavors club.  I finished the market stall back in May 2013 but am just now getting the photos uploaded.  In my last blog (actually 2 blogs ago) I promised that the next one would be some of the finished items.  Well, here it is.


Here are some close ups of the different sides:

Front right side of counter.  The ornaments were made from my Sept. 2012 blog tutorial.  I made the little partitioned box from scrapbook paper edged with a gold paint pen.  The Feather Tree was a project from the NAME Day event.  The stacked tree top ornaments are just beads stacked on a toothpick and lots of glitter.


Front left side of counter.  Victorian cones and ribbon candy under a dome were made by my talented friend, Karen Haggard.  She also gave me the pot of Christmas Cookie pops by Jen Tuttle of Miniholiday.  The soldier is a painted metal miniature.  I made the tray of cookies and ornament under a dome.

Lower front: I dyed the pink Christmas Tree and painted the smaller one white.  All the ornaments and tree toppers as well as the ornament wreath were made from similar techniques mentioned in my earlier tutorials.  The Merry Christmas crate was donated to the NAME Day by Through the Keyhole dollhouse store.  It contains several tote bag items from the event.

Its hard to see but the items on the shelves are:  Top shelf - large nutcrackers are from wine glass charms.  Smaller ones are painted Metal Miniatures.   Middle shelf - Boxes of ornaments including some reproduction "Shiny Brite" ornament boxes from one of my favorite Ebay sellers, Sue's Little Things. Bottom shelf - Glitter house village which I put together from a Carol Kubrican kit (True2Scale).


The left side of the stall has hanging candy items mentioned in my August 10 2013 blog.  The red and white stocking was one of my earliest miniatures purchases from way back in the 1980s.  I wish I knew who the artist was.  The two net stockings were from Lori Ann Potts of Mustard Seed Miniatures - also vintage but purchased recently.  I modified them by adding items inside the socks and adding a paper card and string.


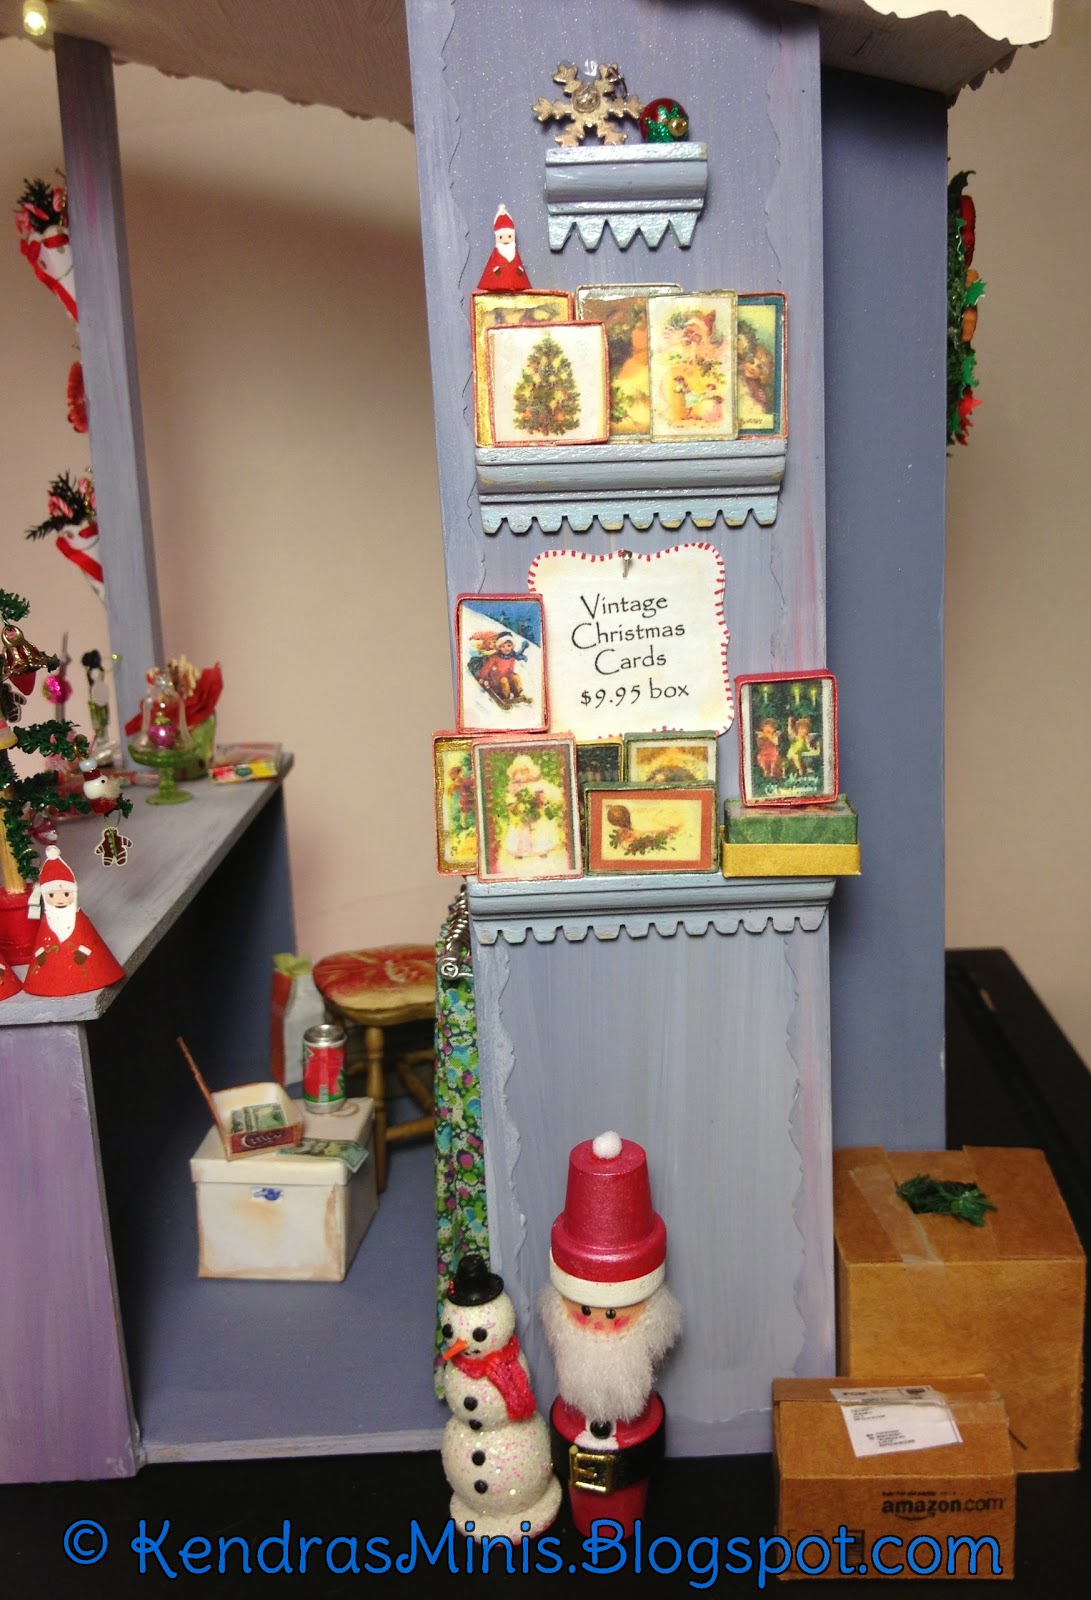
 The right side of the stall:  On the shelves are boxes of Christmas Cards made from some printies provided in the NAME Day tote bag by the late Donna Aldrich.  I wrapped blocks of scrap wood with a strip of folded antique looking scrapbook paper then glued on a card cutout and a thin film of clear plastic cut from a packaging blister.  The flower pot Santa & snowman were projects from the NAME Day event.


Inside the stall I put a little area for the stall owner to sit.  The curtains were described in an earlier blog.  The little stool is the bottom half of a Chrysnbon chair with a chair pad added.  The little filing box is just a block of balsa covered with a metallic gift wrap and a staple for a handle.  The Happy Meal was a tote bag favor.  The little box of ribbon candies (on the counter above the Happy Meal) is another item from Sue Ayers.

Well, glad that I have finished one project...only a hundred more to go!


Wednesday, December 26, 2012

Glitter House Village

I planned to use one shelf in the market stall for a glitter house village. I used kits purchased from True2Scale. I love how these turned out. Here are some hints for doing these kits:
  • If you want trees next to your little house there won’t be room on the small bases unless you remove some sections of fence.
  • If you shorten the wires on the tiny LEDs you can use sandpaper to remove the red or green coating. She says this in her blog tutorial but I didn’t find it in any of the kit instructions.
  • To color the trees (white chenille stems) I used diluted paint and after painting the stem I wiped it up and down the length with paper towel to remove excess paint so it looked tinted
  • I unintentionally painted the inside of the green house with green also and it kind of gives it a greenish glow – I think that could be used to make each little house glow with color.

 I wanted my village to look hilly so I put some blocks of scrap wood (above) on the shelf before covering it with white fleece for ‘snow’. I painted the blocks (below) so they wouldn't show through the fleece.

 I thought the red and green wires might show on the white ‘snow’ so I painted the wires a little.

After finishing my village I decided it would be helpful to have a trap door in the back wall big enough to fit the coin size 3V battery holder so the entire village shelf could be removed if one of the lights went out. I wish I had thought about this before I had assembled and painted the stall (I didn’t think THAT far ahead!).

It was very difficult to cut an opening through the 1/8 inch plywood covered with wallpaper paste and a Christmas card. I use my dremel with cutting wheels and even that took a long time. I had to finish using an X-acto and sawing/rocking motion but finally cut a very messy opening. It will be hidden under the shelf so it won’t be noticeable.

 Trap door to hide coin battery and allow removal of entire village (closed).

 Trap door open (see interior wall covering).

 Finished with the village shelf! The entire shelf can be removed and coin battery is hidden in the false back wall. You can't see the trap door because it is way up under the shelf.


Here is how the false back looks from the back of the stall.  All wires are enclosed in the little 'shed' and false ceiling of the roof.  The two battery packs (one for the shelf and ceiling light string and one for the glitter house village shelf) are accessible through the little door with the hand made latch:


 Next blog - some of the decorations!

Tuesday, December 25, 2012

Vintage Christmas Market Stall – Electrical Pt 2

Finishing the false wall and hinged battery door.


Battery Door - in the last blog I mentioned a door I made in the back wall extension to provide access to the battery pack for the lights.  Here is how I finished it.   I cut the door opening in the flat back wall BEFORE assembling the box.  After painting the false wall section to match the rest of the structure, I added hinges.


I made a sliding latch from scraps of trim wood to keep the door closed.


After trial fitting the wiring cover with the door closed I realized it needed to be reinforced around the opening to prevent the door from pushing in too far.  I cut scrap wood and glued around the back side of the door opening then painted it to match.


For the top of the roof, I cut a piece of white shirt cardboard to cover the balsa and be the outer roof.  I decided on cardboard because the wires still poked up a little past the balsa spacers so I needed something more flexible than wood.  Photo below shows clamping the shirt cardboard after gluing over the spacers to enclose the ceiling wiring.


On to the Glitter House Village! (see next blog on village!).  


Tuesday, November 6, 2012

Vintage Christmas Market Stall – Electrical Pt 1

The market stall is small but sort of deep and dark with the roof on.  If I was going to fill it with hand made things I wanted to be able to see them.  Some sort of lighting was needed.    I ended up using a 10 light LED string set that came from Ikea (but I don’t think they sell these any more).  I decided to put most of them under the back shelves and the remaining 4 would be installed in the ceiling.
Market Stall with Shelf Lights Installed

I marked six dots under the top 2 shelves and drilled holes to fit 6 of the lights in.  

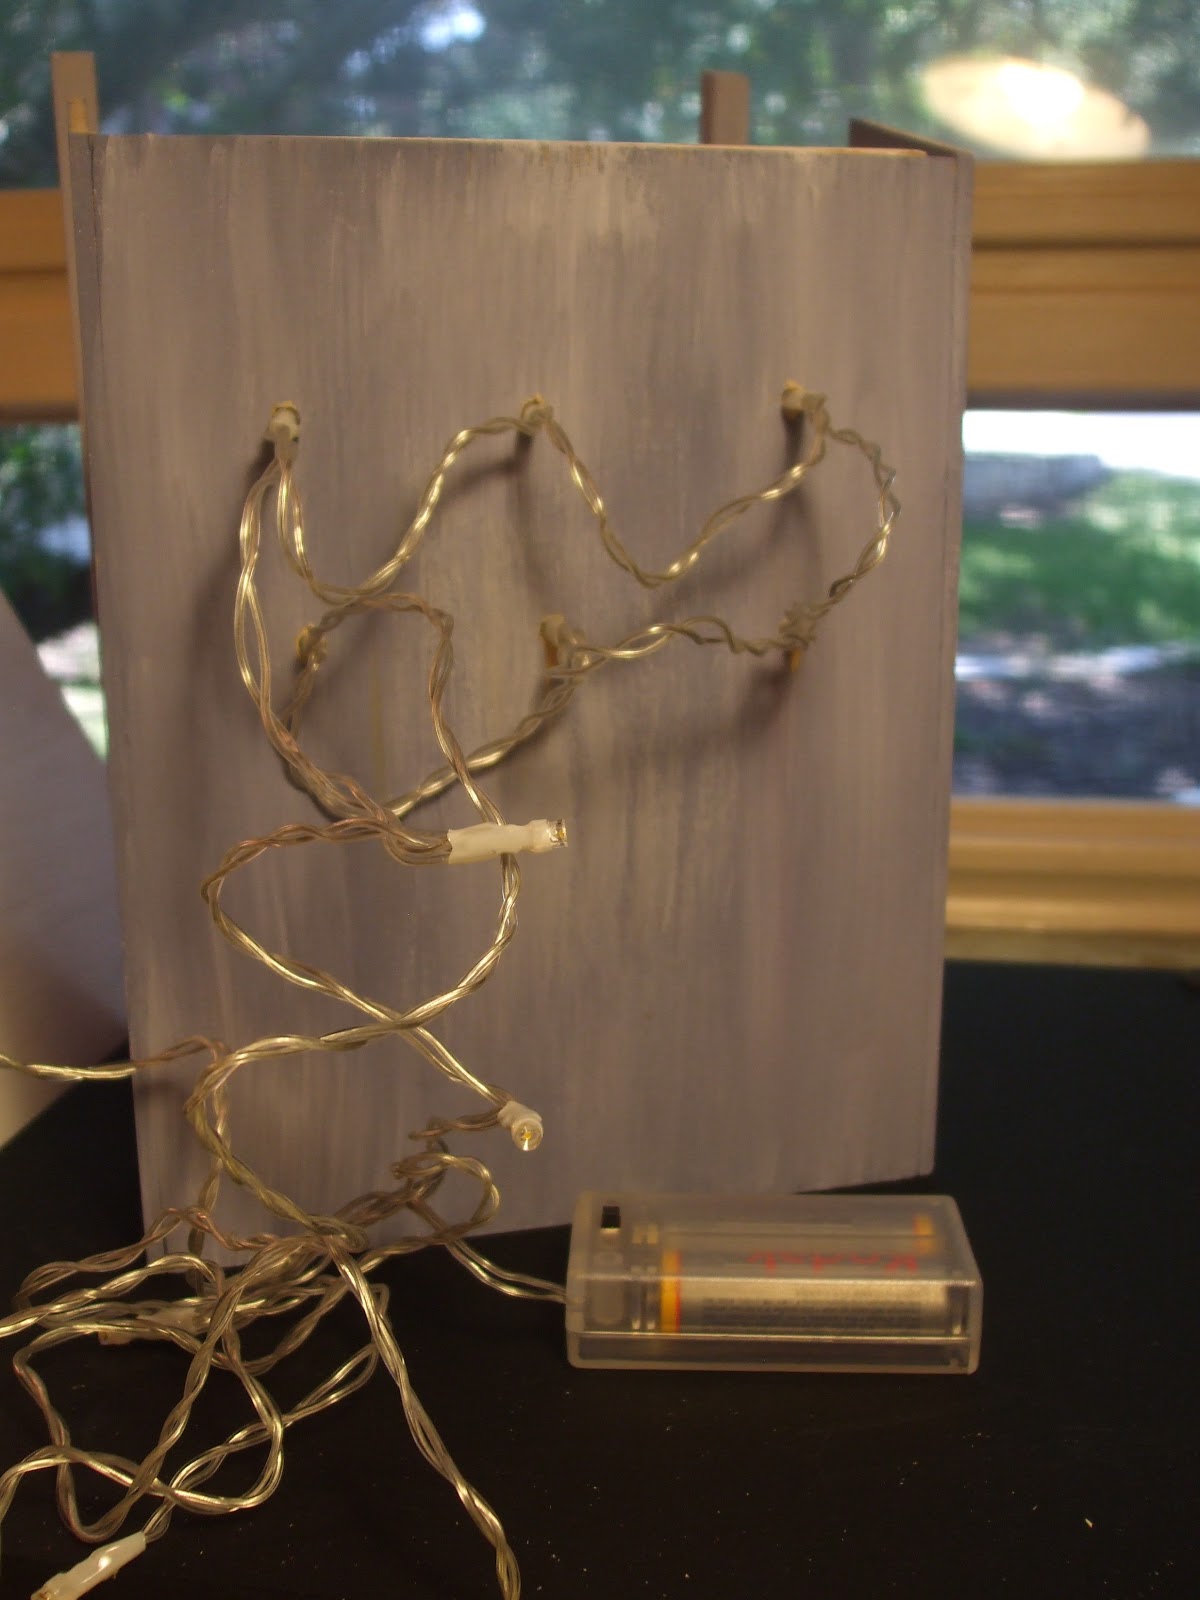
All the wires would now show on the outside of the stall so I will have to hide them somehow.

The remaining 4 lights will go in the ceiling.  I drilled 4 holes in the roof for the ceiling lights.


 To hide the roof wiring, the original ceiling will now become a false roof.  I cut balsa scraps about ¼ inch thick and glued them all around the perimeter of the roof to provide a space for the ceiling wires.  I will cover this later.

Back to the back wall wiring – To hide the wires poking out of the back wall I made a box about 7/8 inch deep.  It had angled sides to fit under the roof overhang.  Here I am marking the angle of the roofline on the side pieces.


Here are the three pieces of 1/16 inch basswood I cut to make the box:


I had to have access to the battery pack so I cut a little door in the box.  More on that in the next blog.

Because the wood is so thin I had to reinforce the inside corners with blocks of balsa :

Here is how the false wall box will attach to the back, to look kind of like a shed protruding from the outside back wall:

Back to the roof – I drilled a 5th hole (see bottom of photo below) to allow the wire to run from the outside back wall up to the roof.  The 5th hole and wire going through it will be covered by the false back and false roof:


I taped all the wires down with duct tape so I could attach the false back and roof :


More on the finished roof and false back in a later blog!!  I’m so tired of all this construction that has to be done!  I want to get to the cute stuff inside!  Blog u later!