Showing posts with label Tiny House. Show all posts

Friday, March 26, 2021

Tiny House Kitchenette Part 2 - Microwave and Stove Burners

This is a continuation of last month (Feb. 2021) Kitchenette Part 1 which described how the open cabinets and appliance doors were made.  This post will describe how to make the microwave, stove burners and counter top.  The stove burner 'drip pans' extend below the surface of the counter through a hole cut in the counter (kinda hard to see in the photo above).  This is to make it more realistic and dimensional.

As was done for last month, there is a downloadable instruction sheet:

[click here for Kitchenette Part 2 Downloadable file and pattern sheet].
 

A few tips and notes from the instruction sheet.

Supplies - these are listed in the linked file.  The Perler beads can be found at any craft store (or Target).  The washers were purchased at Home Depot (instruction sheet gives sizes needed).  The long curved tube beads used for appliance handles were purchased from Ebay (came from China).  Sizes of these are also in the instruction sheet.  Here are some photos of some of the parts used:

Perler Beads (burner knobs)

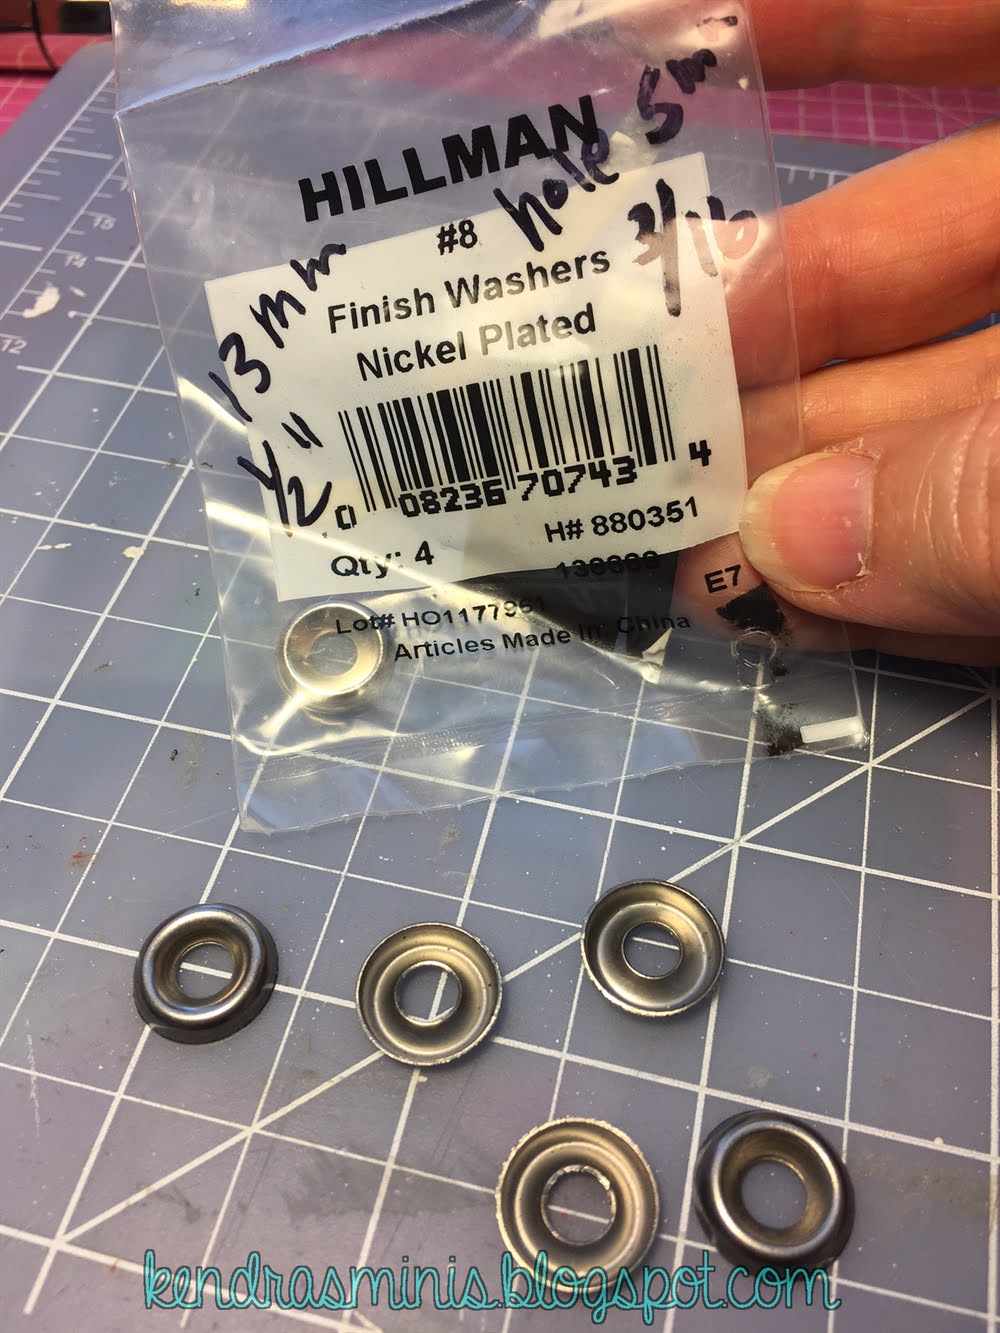
Cup Washer (or "Finish" Washer) - burner drip pan

Star Washer (internal teeth lock washer) for stove burners

Microwave handles were made just like was done for the refrig door but I used a little smaller bead, 2 mm by 20 mm.  Here is how they looked in the package (from China).  The larger beads at bottom of photo had been sanded so the ends were at a point for better fit against the frig door.  But I didn't do that to these smaller beads.

Tube Beads for appliance handles

All the instructions are in the file (see link above) but here are a few main points about making the Microwave:

  • It is basically a wood block with a faux glass door made from clear plastic glued to one side.
  • Wood block can be any kind of scrap wood.  My husband cut mine from a pine 2 by 4
  • Microwave is glued between two shelves then the back of the microwave is glued to the foam core wall.  This made it easier to 'hang' the shelves since the microwave  supported the shelves.  At least this was the intended design for simplicity (remember this was a group project for 85 people).  I changed the design for my own prototype and split my shelves around a window (photo below). 

A few points about the Stove Burners:

  • The burner base is a piece of plastic painted silver with two half inch holes
  • Burner pans (silver cup washers) are glued UNDER the holes
  • Burners (star washers painted black) are glued OVER the holes
  • The entire thing is set into an opening cut in the counter top so the burner pans sit below the surface of the counter


Sink – this was a square shaped tub from Sponge Bob "Krabby Patty" candy sprayed silver- refer to old blog (March 2020) for sink and faucet.

Here is the tiny house kitchenette finished (below).  Because I wanted a window over my sink, I cut my shelves in half and put the microwave on one side of the window.  I also added a third shelf.  Since it is hard to mount heavy things to foam core, I mounted the individual shelves (left of window) by gluing a separate piece of wood (same as shelves were made of) between them.  That piece of wood served to space the shelves equally and was what was glued to the wall. You can also see another spacer above the microwave which attaches the third shelf to the microwave shelf and wall.


Next time...??  What shall we make?

Sunday, February 28, 2021

Tiny House Kitchenette - Part 1

Here is a tutorial for a mini kitchen – a kitchenette from the Tiny House project (subject of most of my blogs for 2020).  The Tiny House was a group project that my club sponsored as a day-long workshop for members.  The kitchenette was designed to be simple (so it could be taught to 85 people in about 2 hours), inexpensive and compact (it was for a tiny house, after all!).  It is basically a short wall of open shelves, lower “cabinets” from foam core and has all the necessary appliances. In that tiny space it has a 2-burner stove, microwave, refrig and dish drawer (dishwasher).  I think some of the techniques shared here could work for travel trailer (think Airstream!) and Gypsy wagon type miniature projects too.

The sink and faucet were the subject of my first post on this project back in March 2020 (click here for link to Sink Faucet Tutorial).  For Part 1 of the Kitchenette covering the cabinet base and appliance doors, most of the instructions and photos are available in this downloadable file and pattern sheet:

[click here for Kitchenette Part 1 Downloadable file and pattern sheet].

Since I had made up these instructions for the event it was just easier to modify them for this blog post rather than uploading all the photos to the blog.  Here’s a summary of the important points if you decide to try to make this kitchenette:

Lower “cabinets” – these are just open shelves of foam core.  Construction is basically just one long piece of foam core scored and folded.  Then the center dividers and bottom are glued in.  If you want, you can add your own cupboard doors but due to the simplicity and small size of our project, we didn’t include doors or drawers.  The front edges and area under the sink were trimmed (disguised) with thin wooden coffee stir sticks.

Appliance doors – For the frig and dish drawer – the doors are made from foam core and covered with a vinyl film that looks like stainless steel.  There are several different companies that make a product like this.  One is by ConTact brand.  The one I used for this project is made by Cricut.  See photos below.  It is not the "removable" kind that I see carried by Michael's.  I don't know if the "removable" product will work - I just haven't tried it.  Here is what I used: 


 Here are my very important tips for covering the doors with “stainless” film:

  1. The narrow edges of the doors are covered in four separate strips of silver film.  You might think it will be a great short cut to just fold the film over the edges but this is a mistake.  Eventually it will bubble up.  Trust me I have done it many times.  The stuff doesn’t like to be folded (I even tried scoring the fold with the back of an X-Acto and it still won’t stay flat and square where it was folded).  
  2. Glue film to the narrow edges of the doors but DON’T put any glue on the front of the doors.  Even though it has an adhesive back, it needs the extra glue for the edges to stay stuck down.  But glue will make lumps on the smooth front so use the film’s own adhesive there.
  3. Any little spec of dust or dirt will be very visible as a lump when the film is laid on it.  Use scotch tape to remove any particles before applying the film to the door front.


Finished Refrig Door

For the handles of the appliances, I used some long curved silver tube beads.  Because I had about 300 of these to make, I ground down the ends to an angle using my husband’s grinding wheel so they would fit more flush against the front of the door.  But if you don’t have a grinder you can use low grit sandpaper (like 150) or just pinch the tube ends with pliers to make them flatter.  I ran a piece of wire through them and poked the wire into the foam door for a little more ‘grab’ than just glue alone.

Well that covers the hardest part of the kitchenette.  Next blog I will tell how the microwave and stove top were made.  Here is a photo of my finished kitchenette in the tiny house:


Wednesday, December 23, 2020

Loft Bed Part 2 – Bedding

Here is Part 2 of the Loft Bed Tutorial.  In this part I will explain how I made the soft furnishings – the bolsters, pillow and soft pom-pom throw.  This bedding (and actually the entire Tiny House project) was a departure from my normal style (vintage, shabby, pink, ruffles, bows, glitter, etc) but I found after making this Tiny House I do like the more simple, less decorated modern style (but I'm not entirely transformed).  I got the opinion of a couple of "Gen-X-ers" on some of the furnishings since I was trying to appeal to a more "youthful" audience with this project.  They felt I did not depart enough from my normal style ("Too much color, Mom!!  Your curtains should be GRAY!).  Oh well, baby steps for this Baby Boomer... 

Supplies - Bedding and Bolsters
Faux “chamois” (soft, fuzzy wash cloths meant for cleaning the car found at Dollar Stores - see photo below)
Tiny craft pom-poms, about 1/8 inch diameter
needle, thread
Craft sand or small no-hole beads for pillow stuffing
Tiny funnel (sand art or perfume) OR small cone made from paper for transferring sand
clear vinyl tubing, about ½ or 3/8 inch in diameter (plumbing -home improvement stores)
Tiny pom-pom trim (miniature show)
Dense Fabric for pillow (that will not let sand through)
Small fabric clips (like some use for sewing instead of pins)
Fabric for bolsters
Thin upholstery foam, about 3/8 or ½ inch thick
Crafter’s Pick Ultimate (best for fabric and almost anything except wood)

Rectangular Bolsters (gray ones in photos)
These were simply pieces of thin upholstery foam, about 3/8” or ½” thick, cut into rectangles and wrapped with fabric like wrapping a package.  I used Crafter’s Pick “Ultimate” glue to seal edges of fabric where it overlapped to reduce thickness (instead of folding over edges).

Round Turquoise Bolsters
For the round bolsters, I cut the clear plastic tubing to about 1-1/2 inches long.  The tubing works well as a bolster because you can stuff the fabric into the center hole making very neat ends.  Cut the fabric about ¼ or ½ inch longer on each end and about ¼ inch longer around the diameter.  Wrap the fabric around the tubing and glue where it overlaps down the center.  This seam side can be glued down to the bed so it won’t show.  On the ends, just stuff the end fabric into the hole.  Use a toothpick to help if needed.  The Pom-Pom tassels will cover any hole if there was one (for instance if using thinner fabric than velvet). 


Close up of velvet bolster from tubing
Pom-Pom Tassels

Basic steps are shown in the photo below.  To make the tassel, wrap sewing thread around a piece of index card about ¾ inch wide.  I wrapped the thread about 30 times.  Use a needle and same color thread.  Run the needle under all the threads and tie a knot gathering all the loops at the top of the card.  Leave long threads here since you will re-thread and use these ties to go through the pom poms later.
With the top of the loops gathered and tied you can cut through the loops at the bottom.  Now tie another thread around the whole bundle about 1/8 inch down from the top tie and knot.  Re-thread the needle with the top ties and poke the needle through the pom poms.  Put some glue on the center end of the round bolster and run the needle through pulling the tassel up against the bolster end.  Trim the tassel to the desired length.

White Pom-Pom Pillow and Throw
The pillow was about 1-1/4 inches square.  First I sewed a pillow from dense white fabric leaving one side open (dense enough so sand won’t sift through it).  The sand or no-hole beads make the pillow much more realistic since you can sort of squash it into a nice shape (or give it that decorator's "Karate-Chop!"). I used a tiny funnel that came from one of my kid’s “sand art” craft toy to help get the sand into the opening.  The opening was sealed with Crafter’s Pick glue and clamped with little clips.  Then I glued on a cover for one side from the dollar store chamois.  Pom-Poms were glued around on three sides only so it would sit level on the bed.  The throw was made from the same chamois and some tiny trim I found at a miniature show.  The trim sort of looks like little pom-poms.  It was glued all around then I added larger pom poms at the four corners.  I draped it so one corner sort of touched the floor and glued it in place.

Dollar Store Chamois

Pillow Front (Chamois side)


Pillow Back (fabric side)

Glued and draped Pom-Pom throw

Hope this tutorial was helpful to some readers who want to make modern bedding. I will try to squeeze one more tutorial in before the end of the year (Yikes!  It’s almost the end of the year!!).  Hopefully some of the accessories you see in these photos.  If I don’t get around to it…

MERRY CHRISTMAS to all my readers!!

Monday, December 21, 2020

Loft Bed Part 1 - Platform Bed Structure

Here is a tutorial for a bed that fits into the (very tiny) loft space in the tiny house.  The loft floor was only 8 inches by 4 inches.  I needed to fit a bed and some display shelving into that small space.  I made this in three pieces – two end shelf units and the platform (mattress support).  The shelf units and bed platform were built from scrap basswood and foam core.  The “mattress” was carved from a piece of ceiling tile – a technique I learned from Judee Williamson – from her “Judee’s Beds” book.

Supplies for the bed and shelves:
Scrap wood (basswood strips) - mine were 3/4" wide x 1/16th inch thick
Foam core scraps
Acoustic Ceiling tile scrap (the kind used in basement ceilings)
White felt (enough to cover mattress)
Fabric to cover mattress
Paper Punch, if desired, to add some dimension and interest to the shelves.  I used Martha Stewart “Caning” all around punch (see photo below)
Gesso (paint primer)
Acrylic paint
Sandpaper (320 and 400 grit)
Wood Glue and Crafter's Pick Ultimate (for everything non-wood)

Bed Platform – 
Here are the finished measurements:
End shelf units - 3 inches high x 3-5/8" deep (projecting from back wall) by 3/4" wide
Bed platform section - 3-5/8" deep (projecting from back wall) x ~3/4" high x 6-1/2" long

I won’t give exact dimensions for cutting wood pieces since I kind of just figured it out as I went, starting with the size I wanted the mattress.   The wood used was 1/16th inch thick.  The entire loft floor was 4 inches by 8 inches.  But basically, here is how I made it: I cut a couple thicknesses of foam core as the platform base.  The mattress would lay on the foam core.  I framed the foam core in bass wood strips a little wider than the foam core so it extended above the base a little to contain the mattress.  I intended to paint the wood so I didn’t worry much about nice finished joints.  I just painted with Gesso sandable primer and sanded (400 grit) so all the front facing corners would be smooth. Then I painted with white acrylic paint.

I glued the bed frame and shelves (below) with wood glue because I had intended to sand them and you can’t sand if using the “Ultimate” glue – it just balls up and pulls out of the glued seams.


Side Shelf Units – I built these from scrap basswood – see the photo and finished sizes above.  There are two open squares, one for the headboard and one for the foot board, each with a shelf across the middle that matched the height of the bed platform.  I used just a piece of foam core to fill in the side next to the mattress and another smaller piece to square it up in the middle back– this would be hidden by the bed and walls in my loft. The idea was that when the bed was in place, items could be displayed on the lower shelf and they would not be obstructed by the mattress and bolsters.

I finished the same way as for the platform (Gesso...sand...paint).  To add some interest to the front of the shelves I applied some pieces of punched out paper using the Martha Stewart “caning” punch.  This is sort of a fretwork pattern.

Martha Stewart Punch for fretwork design

 
Close up of applied paper punch details

Mattress and cover
I cut the mattress from the acoustic ceiling tile to fit inside the frame of the platform (see photo a few paragraphs above).  I sanded all the edges to a rounded shape with 320 grit sandpaper so it would look like a mattress (lots of dust – use a mask if you are sensitive to it).  I covered it in white felt since the ceiling tile was sort of dark and I didn’t want it to show through the light fabric I used for a covering. I used the Crafter's Pick Ultimate glue - works great for fabric!

To cover the mattress with fabric, I just cut the fabric large enough to wrap around all sides and glue to the bottom of the mattress.  I just made sure to make very neatly glued corners.

Another view of the finished loft:

That's it for today.  Next time I will tell how to make the bedding and bolsters!

Monday, November 30, 2020

Modern Floor Lamp Tutorial

Here I am squeezing in a tutorial for November on the very last day of the month!.  Boy has this month gone fast!  For the tiny house project I wanted to make some modern lamps.  The white one above is lit with an LED bulb and uses only a 3 volt battery.   The whole Tiny House is powered by two AA batteries (total 3 volts).  See my other recent blogs about the tiny house by clicking keywords "Tiny House" in the sidebar.  For this lamp, I was inspired by this modern Trousdale lamp from jonathanadler.com:

There is also a wonderful miniature version by PhillipNuveen (Etsy shop) that is very reasonably priced.

But I wanted to make my own.   I have been experimenting with the LED bulbs trying to adapt them to dollhouse lamps.  You can see some of my earlier blogs with tutorials using LED bulbs here:

https://kendrasminis.blogspot.com/2020/09/tiny-house-light-fixtures-pendants-from.html

https://kendrasminis.blogspot.com/2019/08/artichoke-sconces-tutorial-adapting.html

This was an easier project because the 3 Volt bulbs have very thin wires with no lumps. Bulbs tht have been modified for use with 12 volt dollhouse systems or 9 volt batteries are protected by way of a lumpy resistor embedded in the wires.  That resistor makes it hard to hide the wires or thread them through brass tubing or beads.

Following is how I made the lamp from mostly wooden turned craft parts.  Except for the furniture leg, these were probably purchased at Michael’s or Hobby Lobby.  The furniture leg was in a bunch of wood parts I bought at an estate sale so I don’t know the brand.  I made this lamp so that the bulb would be removable (even though they have a really long life).

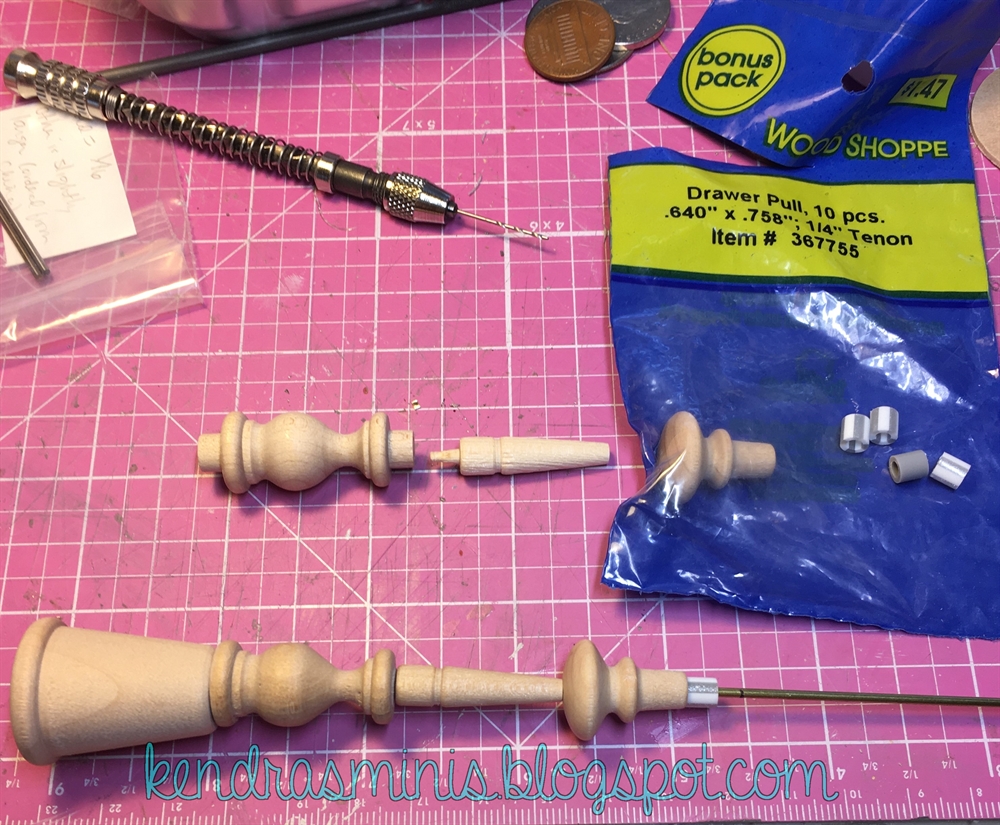
Supplies – Lamp Base (wood parts):
Wooden thimble
Wooden turned spindle piece
Furniture leg
Drawer pull
Flat wooden circle, a little bigger than the thimble
piece of scrap wood 1/16th thick or so small enough to fit inside the thimble

Other parts and supplies:
1/16th inch brass tubing, the length of the finished lamp
3/32 inch clear acrylic tubing, few inches long (should fit over the brass tube)
LED bulb – I used “Mega” warm white 3 volt from Evan Designs
Scrap of aluminum tubing that fits over the brass tube and inside the clear tube
Spray paint, blue painter’s tape
Drill press to drill hole vertically through the wood pieces before assembly
drill bit the size of the brass tube
Razor saw and miter box to cut clear tube
Wire cutters
glue

Wooden Parts assembled

To make the lamp base – Look at the photo for the order of the parts (thimble on bottom, finial, furniture leg, drawer pull).  I had to drill through each piece to allow for a piece of brass tubing.  I used a drill press since it had to be very straight and centered (you can see on the finished lamp some pieces were not perfectly centered).  This was hardest on the thin furniture leg.  Cut the brass tube a little longer than your base.  I used an X-acto knife and cut mine about 4 inches long. Thread the brass tube through the pieces and let it stick out a little the top.  The thin brass tubing served two purposes: 1) sturdiness in holding the parts straight and together and 2) conduit for the bulb wire. 

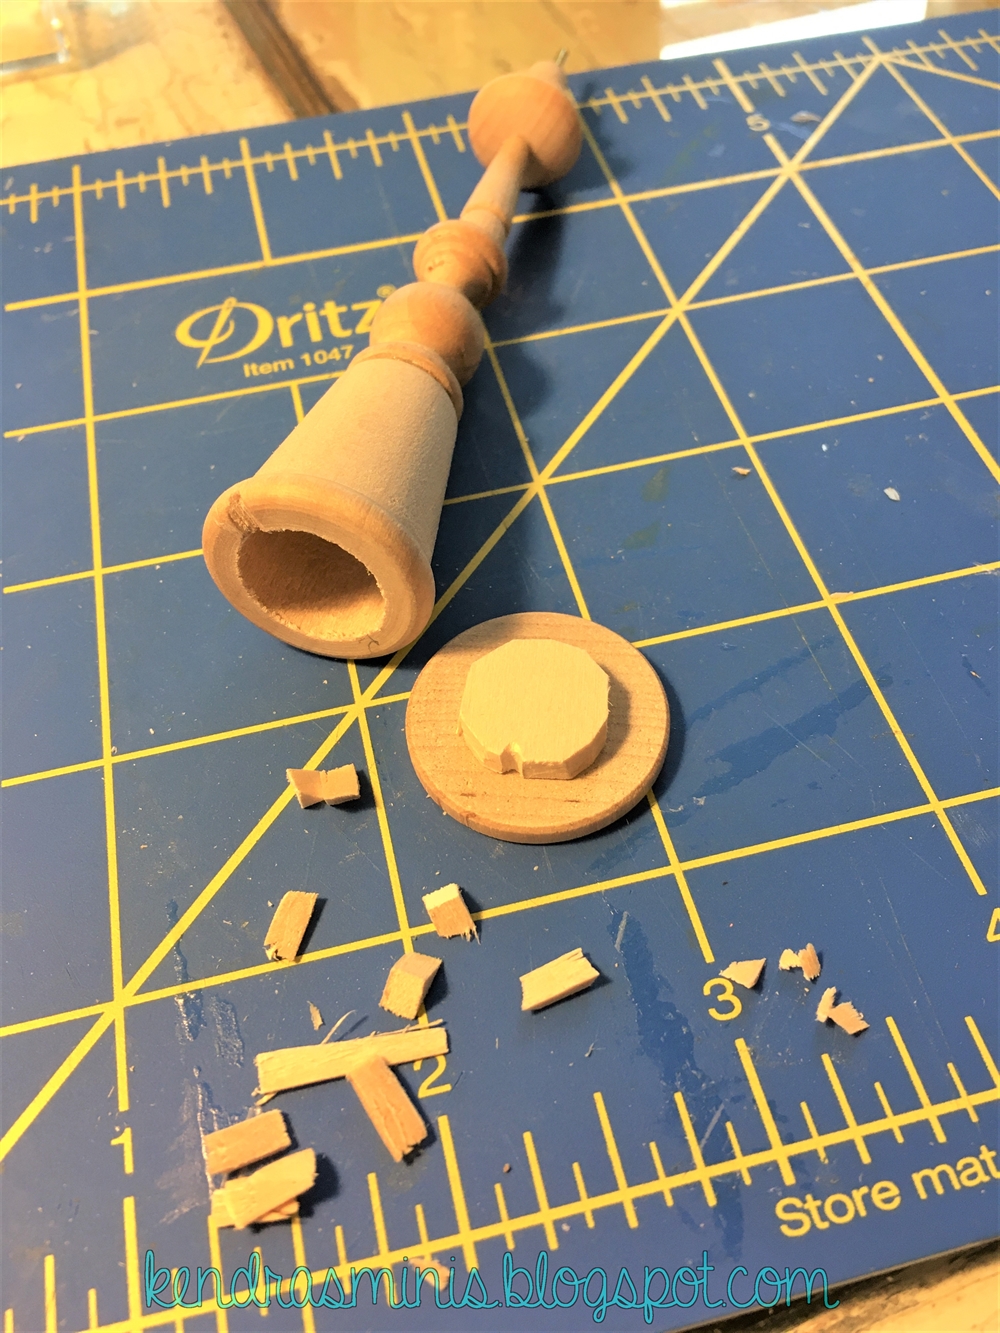
I also used a wood circle shape and piece of scrap wood for the bottom.  I cut the scrap to just fit inside the thimble.  I filed a small channel into the thimble and the scrap wood where it fits into the thimble for the wire to come out and so the bulb could be entirely removed and replaced.


Glue the wood pieces together EXCEPT the very bottom circle, and spray paint.  Let dry.

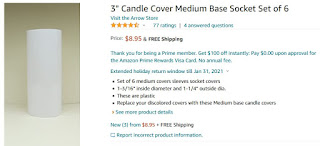
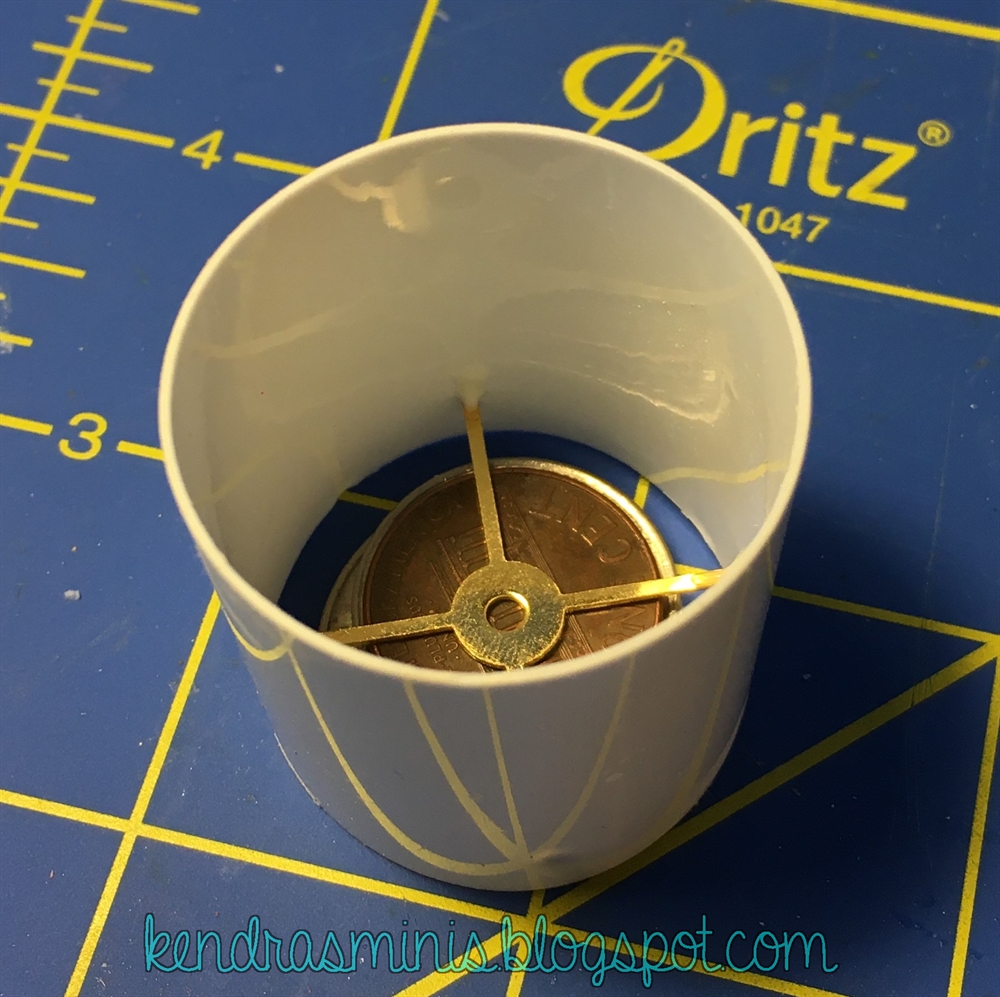
For the lampshade: white plastic candle socket cover (for of a full size chandelier), 1-1/4 inch diameter, Amazon).  Jewelry finding – cross shaped finding that is about 1.5 inches in diameter (JAR-JAF Item #1391 or #65 depending on the size of your lampshade). 


Cut the white candle socket with scissors to the size you want for the lampshade.  You can sand the cut edges to smooth them and square them.  Cut off the outer loops of the cross shaped finding with wire cutters so that it just fits inside the lampshade.  Use a stack of coins as a spacer between the cross piece and the work board.  This will also keep the cross piece level.  Glue the four “spokes” with white glue.


Hold your lampshade to your lamp to determine the length of clear tubing you will need.  Cut the clear tubing to reach between the top of the lamp base and the lampshade cross shaped piece.  Size depends on the size of your lampshade.  This will just be to support the shade and keep it straight. Make sure the top and bottom where tubing was cut off is perfectly square so that the shade will sit level (use miter box).  If necessary, use some sandpaper to smooth. Drill a hole in one side near the center.  The bulb will just sit next to the tube as in the photo below.  Thread the wire through the clear tube then down through the brass tube. I had to also use a scrap of aluminum tube as a spacer since the clear tube was too big for the brass tube and would have wobbled.


For the lamp shade finial – a white glass head pin, silver 2.5mm crimp tube and a piece of tubing or clear acetate rod (or Q-tip tube?), about 1/16th inch thick or plastic that will fit through the center hole of the jewelry finding and down inside the clear acetate tubing.  The finial makes the shade removable so you can get to the bulb in case it needs to be replaced.


Here is the lamp when lit.  You can see that the "mega" type LED bulb from Evan Designs is very bright.

 
Hope you enjoyed this modern lamp tutorial.  What shall we do for December???

Monday, September 28, 2020

tiny house light fixtures - Pendants (from earrings!) and Sconces

 
I love to make one of a kind light fixtures from brass parts and beads because they can look very unique and custom.  I buy my LEDs and battery holders from Evan Designs (see links throughout this post).  The main thing to know when making fixtures using LED bulbs is to use the 3 Volt bulbs if possible.   They have the tiniest wires (no lumps) and can be threaded through narrow beads and tubing – making the most nicely scaled lamps and fixtures.  Another benefit of the 3 volt LED wires is that they can be drawn through holes in the foam core using a draw thread after the walls are papered (more about this in a later post).

The LEDs use so little energy that you can power even 10 or more bulbs for several hours with a coin cell battery – enough for exhibiting at a show.  The 3 Volt LEDS can also be powered with two AA or AAA batteries which can handle more bulbs than a coin cell (30 per Evan Designs) and last longer.  (Watch for an upcoming post on how I hid the batteries for this project).

**Click on "lighting" in the sidebar "Blog Keywords" for other posts about LED lighting hints.**

But, back to the 3 Volt lights -- will they be bright enough for a 1 inch scale room?  That depends on how many you use and which type.  The “Mega” give off a lot of light.  They are harder to hide in scale lamps and fixtures (I used Mega in the kitchen pendants and a floor lamp).  If you are just wanting a “glow” for effect then the tiny ones are fine (Nano, Chip).  I used the tiny “Nano” size in the bathroom sconces and they give off a nice glow.

Following is a tutorial on making the wall sconces from the Tiny House bathroom and the kitchen pendants.

Bath Sconces

Supplies:
  • LED bulb – 3 volt “nano” size from Evan Designs.  I always use warm white and order the extra long wires (14 inch). 
  • Brass tube 1/16th inch from Hobby Stores or Ebay (K&S is one brand).  I bent it with pliers protected with a folded piece of craft foam.  It can be cut off using just an X-Acto knife. Make sure that the tubing is cut long enough to extend through the base and poke into the wall a tiny bit to provide a more secure gluing base (for gluing into foam core).
    Bath Sconce Supplies

  • Cord End - Brass or gold colored cup shaped jewelry finding with hole in the end – I enlarged the hole with an X-Acto knife to fit the brass tube. This is the “socket” that the crystal bead fits in.
  • Plastic or crystal bead (large hole if possible).  I just pushed the LED up as far as it would go but it wouldn’t go inside the bead.  Since the Nano bulb is so tiny it won’t really matter that it isn’t entirely inside the bead (unless you can see it up close in your room).  Acrylic beads work great because you can usually enlarge the hole enough to embed the tiny “nano” bulb using just an X-acto knife or drill bit.
  • Brass hexagon shaped piece (Etsy – Brass Kicker) for wall mount base (drill hole in center big enough for tubing).  But you could use any brass disc that can be drilled – or disc shaped bead spacer.


Assemble in this order: thread bulb wire through Crystal bead, cord end, brass tubing.  I didn’t use any glue, the wire sort of just stays.  If you need to glue, use bead glue (the kind that doesn’t frost beads – like GS Hypo Cement).  I poked a hole in the wall and pulled the wires through to the outside of the building then glued the fixture to the wall (probably with Crafter's Pick Ultimate Glue, can't remember).  On the outside of the wall I hid the wires under some wood trim.

Kitchen Pendants

I mounted the kitchen pendants on brackets because they couldn't be hung from the ceiling.  The ceiling of the Tiny House was a big clear plastic viewing window.  I made the brackets just long enough to clear the shelves, about 2-1/4 inches.


In the photo of the finished pendants, one looks brighter than the other.  This is because I didn’t get the LEDs facing the same way or one was slightly uneven when pushed up into the plastic bead.  Something to watch out for when you make your own.  The LEDs do have a front and back and need to be facing the same way when used in pairs. With the warm white ones, the "front" (light emitting) side is sort of yellow - like an egg yolk.


Evan Designs 3 Volt Mega LED Warm White

Kitchen Pendant Supplies:

The photo with pink background was a "trial" fixture using a different type of bulb and without the pony bead but shows the cage and cord end up close.


Pony Beads and Cord Ends

  • LED – 3 volt warm white “Mega” LED (Evan Designs) with 14 inch wires.  I used “Mega” so it would give a bright light.
  • Clear plastic pony beads to simulate bulbs, I enlarged one hole slightly with a metal file (sort of squared up the hole) so the LED would fit up inside the bead and shine straight down.
  • Cord ends (same as used for the bath sconces above).
  • Brass tubing – two pieces were used for each one, a shorter one inside the “cage” to disguise the wire and another longer one to hide the wire between the fixture and the bracket
  • The cage part of the fixture was made from some geometric earrings (Ebay).  There are several types of cage earrings shown in the supplies photo but the one I used was pyramid shaped.
    Pendant Supplies


  • Wall brackets were made from slices of crown molding (Ebay Seller Manchester Wood Works, item MW 12023) and basswood scraps about 2-1/4 inches long by 3/32 inch thick.  A hole was drilled at one end for the wire.  The corners on one end were beveled with sandpaper.  Glue the crown molding to the flat wood piece with wood glue.  I cut the crown molding on my table saw to match the width of the flat wood piece but you can also buy sliced crown molding pieces from the same seller (and glue two together if they are not thick enough).
  • Brass strips (from a K-S metal scrap bag) were used to hide the wiring on top of the bracket. These scrap pieces had a very narrow edge on both long sides providing a "track" for the wires to be hidden. But if you can't find these specific pieces, you could also sandwich the wires between two pieces of wood with a carved channel to cover the wires.


I threaded the Mega LED wires through the pony bead, cord end, then short brass tube.  Then I sort of wrapped the wire around the ring at the top of the earring cage.  Then through the long brass tube then through the hole drilled in the bracket.  I laid them flat across the top of the bracket and glued on the brass tracks covering the wires.

When dry I pulled them through a hole in the wall and up through the foam (inside the wall) to the top edge of the wall.  I used a big needle and some button thread to make a loop to draw the wire through the hole.  Since the Tiny House was still just a shell and I hadn't filled it with furniture I was able to lay it on its side to glue the brackets to the wall.  More on how I covered the wires and brought them to the battery area in a later post.

Hope you enjoy making pendant fixtures.  There are lots of earring styles that would make great modern "cage" fixtures.  Watch for the making of some more modern lamps in an upcoming post!