

You will need:
- medium weight cardboard (a little thicker than index card is best - like cereal box)
- knit fabric (tiny stripe is good - I used an old discarded camisole)
- fabric for cuff (I used red velour)
- stuffing - such as polyester fiberfill or fluffy white cleaning cloth
- cardboard for form
- fabric scissors
- fabric glue - in fine point glue applicator
- tiny items to 'stuff' into top (plastic figures, dollhouse dollar bills)
- Christmas candy, slices of fimo candy sticks (canes), suckers, etc
- tiny ball trim (mine was cut from the edge of Christmas floral ribbon from Hobby Lobby)
- greenery sprigs (I used small trim with holly leaves from Hobby Lobby - see photo). I would suggest NOT using the old "lycopodium" preserved greenery. Although it is perfectly scaled for Christmas greenery it disintegrates after 20 or 30 years leaving your project falling apart.
- silk ribbon for bow
- Pattern - click here for link to pattern
Instructions:
Cut out a stocking shape from cardboard using pattern. I wanted it to look sort of skinny - like it was stretched from the weight of items inside. I made the toe pointing down.
Cut a piece of stretchy T-shirt like fabric about twice as wide and 1 inch longer than the pattern. Decide which direction you want your toe to point then lay it down the OPPOSITE way. You will be working on the back of it in the next steps.
**DO NOT PUT ANY GLUE ON FRONT OF CARDBOARD** Place some fabric glue along the long side (back) of cardboard cutout pattern. Lay fabric (wrong side down) on the glue, covering about half of the pattern. If there are stripes, make sure they are straight (aligned with the long side of pattern so when fabric is folded to front they will be going straight across).

Now trim off some of the fabric away from the toe area to reduce bulk (see photo). Put some glue around the toe area of the cardboard. Trim fabric around toe area so it is only about 1/8th inch bigger than pattern. Fold this 1/8th inch up covering toe area and keeping tight to the cardboard.

Continue trimming fabric about 1/8th inch beyond the bottom of sock and gluing it to the cardboard, keeping tight to the shape of the cardboard.

Make a clip in the fabric at the heel.

Trim and glue the remaining half of the back side of the sock. Let it dry a little (depending on your glue) maybe an hour or so.

Finished back of sock:

Front should look like this. Since you used no glue on the front, it should stretch and have room for stuffing:

Take some stuffing material (I used clipped pieces of a fluffy white car detailing rag from the dollar store). Stuff them down into the sock so they make it look lumpy - but not too full. You want to keep the general shape of the sock.

Fillers - I had some tiny plastic Santas (about 3/4 inch tall) that I re-painted to add some detail. You could also use dollar bills, small toys, suckers... Also gingerbread man and gingerbread house fimo canes - slices from these make great filler.

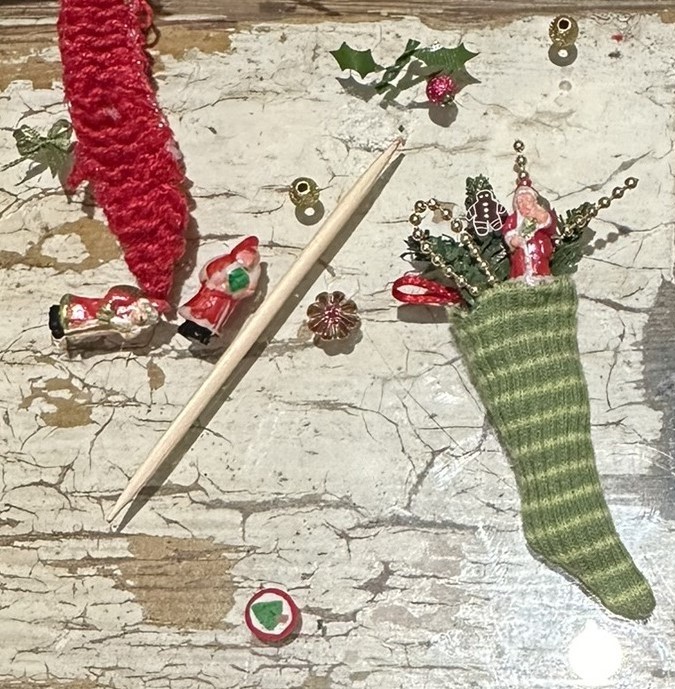

Add a little bow and DONE!
