Don’t you just love those LEDs? The only problem is hiding the lumps and wires. In today's post, I will describe what types of LED bulbs to use for cabinet lighting and how to hide the wiring. First I have these tips working with LEDs:
LED Tips
- Evan Designs – they have a great website that has lots of information about the types of LEDs and how to connect them. They even have videos on how to put them in room boxes, how to splice, etc.
- If ordering from Evan, always get extra long (14 inch) wires on your bulbs. It only costs 10 cents extra per bulb and gives you a little more wiggle room when trying to hide lumps and wires.
- For small projects (few bulbs), my advice would be to use the 3 volt bulbs and 3 volt button battery (or 2 x AAA battery pack OR 2 x AA battery pack, all are 3 Volt). The reason is that there are no lumps on the 3 Volt bulb wires and they are easier to use in fixtures and hide behind backsplashes, etc. (chips - nano, pico, etc). I used a 9 Volt battery in this project because the bulbs provided with the kit (which I used for the sconces) were that type.
Sconces – 1.8 mm bulb
Inside cabinet (upper) – “nano” chip
Under cabinet – “chip” size
Other supplies: 9 Volt battery holder and battery, switch, extra wire and heat shrink tubing for splicing.
Hiding Wires
- Sconces – see my previous blog for how I made and installed these. These 1.8mm bulbs have thicker wires that are harder to hide. The sconce wires exited the back of the upper cabinets and were glued across the back to the center joining the other wires (upper and lower cabinet bulbs) and brought down behind the backsplash.
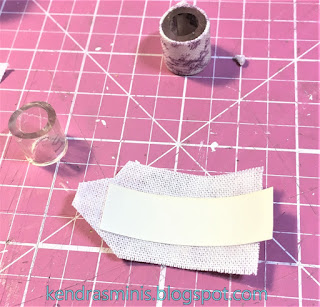
- Upper cabinet lights – I made a hole at the top back of the cabinet. Before putting the bulb through I carved a channel down the back of the cabinet and removed just a couple layers of paper with my X-Acto. This is where the wires would lay when the cabinet is glued to the wall. Next, I pushed the bulb through the hole (the “nano” chip is almost smaller than the wires). I glued the nano chip with Crafter’s Pick Ultimate glue to the inside center top of the cabinet. I held it in place with small clamps (careful not to break the chip with too tight clamps). When the bulb was set and dry, I laid the wires in the groove then covered it with a strip of index card. I painted the red and green wires to match the inside cabinet.
Carving a channel for wires - Under cabinet lights – These were glued to the underside of the upper cabinets about halfway back (putting them too near the front makes them too visible). I used a small spring clamp to hold the bulb while it dried. After the glue was dry the cabinets were glued to the wall.
- After hanging the upper cabinets, I had 3 sets of wires below each cabinet (sconce, upper cabinet light, under cabinet light). The backsplash was going to cover the wires on the wall. The backsplash was tile paper glued to thin cardboard. I then glued “spacers” of 1/16th thick basswood to the back allowing a channel between the wood pieces for the wires.
Backsplash with spaces for wires - In the area behind the lower cabinets, I had to splice in additional length on some of the bulb wires so they would reach over to the battery holder. In the photo above you can see the "lumps" in the wires just below the backsplash tile.
- I made my lower cabinet fronts removable for access to the battery. There is a “toe kick” (strip of cardboard painted to match the base color of the cabinets). The cabinet front is held in place by tension. Foam core dividers prevent the front from pushing in too far.
- The battery pack has a small button. I carved a hole in the side of the box (under the counter) so that just the button could be pulled outside.
- After the sink was glued in, the counter top was placed on and the false front pushed in place concealing the wires and battery.


