Saturday, December 28, 2019

Guys from Texas Room - Christmas Greenery Decorations Tutorial


As promised here is the second installment of the ‘Guys from Texas’ room.  Below are mini-tutorials of how I made some of the Christmas Greenery for the room.

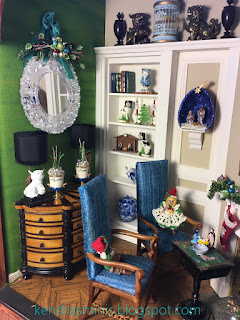
Greenery Sprays (including one with stocking hooks)– There are two sprays, both made very similarly.  One above the mirror (see photo above) and another on the mantel.  For both I started with very narrow wire greenery sold on spools at Hobby Lobby (see second photo below).  I made the base form by cutting and shaping the stems.

For the mantel one, to make it removable, I glued the greenery to pieces of plastic cut from grocery store clear plastic spinach cartons.  I glued the greenery and some wire stocking hooks with Quick Grab glue.


I thought the greenery was too dark so I lightened it by brushing on a mix of lighter leaf green and metallic green.


To the base greenery shape I added snips of artificial pine needles bundled together with glue.

Added small glue dots (using very fine glue applicator) and sprinkled with red glitter for “berries”.
Holly Leaves – cut from green paper using scrapbooking holly leaves punch.  Edged with light green paint and scored a vein down the middle with the back of an X-Acto Knife.


Placed a few of these leaves among the greenery then added ornaments (glittered beads).


That's it!  The stocking greenery just sits on top of the mantel and can easily be removed.  The hanging one above the mirror is held on with blue-tac and removed after Christmas.  Next blog I will cover how I made the removable vase fillers in the ceramic vases from silver beads and sprigs.

Well, I have achieved one goal this year - to do one blog post a month (well, actually I skipped a couple and doubled up to make up for it but STILL that is 12 posts for one per month AVERAGE!)  Whew!  Hope my readers have a wonderful New Year in 2020!


Wednesday, December 25, 2019

Guys from Texas Room


To my readers – I am so sorry I skipped November!  I was trying to have at least one blog per month and I missed my goal last month.  So I will make two posts before the end of the year!

The roombox that is the subject of this post was designed by Jon Fish and Larry Osborn (The Guys from Texas).  You can see many examples of their work on past blogs by Goodsam Miniature Showcase  and on pinterest.  They are well known for their wonderful resin molded architecture pieces, detail and accuracy.  They are also very generous with their knowledge.  Taking a class from them was an awesome experience.  Unfortunately we lost Larry this year (2019) but I think Jon is still doing miniature work.

The lovely lady who had taken the workshop and completed the original roombox was downsizing and donated this room to S.A.M (Society of American Miniaturists).  I snapped it up at their 2017 auction. What I love about it is the hidden room (behind the bookcase) and arched front.  It is also electrified and has a very nice fireplace.  Here is a photo of it when I bought it.

I wanted to re-do the room in strong colors – not typical of what I normally do (in other words, not pink!).  So I decided on a blue and green color scheme.  Here is the current design – still unfinished.

Since it has such a nice fireplace, AND that fireplace is so close to the front, I had to use it to display my petit point stockings.  So if it had stockings then it had to also be decorated for Christmas.  I decided to make removable decorations so I could put them up at Christmas time.  Here is the room with the decorations added:


So... I know these decorations are a little "overdone".  I am still working on this. I love the glittery nativity set on the wall but it is really too large for that space.  But I thought I would share how it is looking so far.  Merry Christmas to my blog readers!  Tomorrow I will post how some of them were made.

Wednesday, October 30, 2019

Kitchen Project - Final Touches (and some mini tutorials)!

 
This is the last post on the Kitchen Project that began last March 2019.  I'm going to tell how I made the counter, hanging shelf and the little painted stool.  Then I will give resources for items that I didn't make and close up photos.  One thing I still want to do is give the frame some sort of finish but I haven't decided on that yet. 

Kitchen Counter
Below are photos of my paint colors and practice.  My goal was not realism but more 'fantasy' stone look in colors to go with the green cabinets.  I just layered the colors in the order listed and made streaks in the last two colors.

Close up of counter - right

Close up of counter - left

Wall shelf (right side of kitchen)
This was a vintage kit by The Kummerows (I think) purchased from Ebay.  The kit (called "Intricut") made two shelves, one larger (the one I finished) and a small one (you can see it still on the leftover kit sheet).  The instructions were to use a jewelers saw (2nd photo) to cut away the printed blue areas.  I must say I was a little intimidated to try to use this saw but it was a little easier than I thought it would be.  If you have a chance to find one of these kits my advice is to not be afraid to try.  It turned out really nice.  I used a teak oil finish because I wanted it to not be shiny (like polyurethane).


Finished shelf

Painted Stool
The hardest thing about this stool was how to glue the legs so they would be at an angle and sturdy enough to not fall apart.  The stool was made from a 1 inch wood disk, four porch spindles and some scrap wood.  I made two jigs from scrap wood.  One was glued to the bottom of the round disk to glue the legs against.  It was a thick square piece, about 1/8 inch thick.  I 'carved' a rounded area on all four corners using a rat tail file.  I also drilled holes into the disk so the legs would be slightly inset.  I used a second jig with holes drilled for the bottom of the legs.  The second jig was not glued to the legs - only used to hold them at the right angle while glue was drying.

After glue was dry I decoupaged a purple floral design to the top and painted the legs with acrylic paint.
Photo showing jig #1 glued to under side of stool
Photo showing jig #2 for legs (bottom)

Finished Stool

Other items in the photos:

Close Up - Mackenzie-Childs style canisters and Pitcher
 
Left side of kitchen
Upper cabinets - vintage purple transferware tea set by Jean Yingling (Ebay purchase)

Left Wall - fretwork tray by Gary and Carrol Elmer (GWE-CHE).

On countertop: Mackenzie-Childs style wicker canisters (made by me), Soap pump bottles by Wilhelmina Johnson (gift).

On stool  - lavender plant by Alice Guhl (show purchase).


Right Side of kitchen
Upper Cabinets - Purple Chrysnbon decanter and goblets (Ebay); grape pitcher by Valerie Casson (Ebay);  lavender rim plate by Ron Benson (Ebay); lavender platter by Janet Uyetake

On countertop: floral pitcher by Karen Haggard, meatloaf in progress with tiny readable recipe by Lyn Latimer (show purchase).

On shelf: Salt and Pepper grinders (click here for tutorial).

Close up of "meatloaf in progress"
This was another fun project and I am grateful to the S.A.M. organization and specifically the wonderful Houston area clubs that designed and made the kits for SAM.  Can't wait till the next one (February 2020 and my Austin club is in charge!!)  What theme will we pick?  (Here's a hint: there are a lot of these TINY things on TV shows!!)

Hope you liked this kitchen project.  Next time - (don't know yet!!).  Guess it will be a surprise!

Saturday, September 28, 2019

Kitchen Hardware and Cheater Flooring


This is the last tutorial I have planned for the SAM (Society of American Miniaturists) Kitchen project.  I have saved the cabinet hardware and flooring for last.
 
Door Knobs:
Glass head pins (pale blue - JoAnn's)
Glass Stain
Small domed bead cap
Filigree snowflake type bead cap
small gold seed beads
Bead glue
Wire Cutters

To make the door knobs, first I painted some pale blue glass head pins with purple glass stain and let them dry.  Then I cut off the glass knob with wire cutters leaving about 1/4 inch of pin below (just enough to go through the dome bead cap and through the cabinet door.
Flatten the snowflake shaped bead cap and cut off the spikes with wire cutters. Two of these will be glued above and below the knob.
Make a guide hole in the cabinet door between the spikes (using another un-cut pin).
Trial fit and glue cut pieces as in the photo with one spike above and one below the knob.  Thread the small gold seed bead onto the pin and glue up against the glass head of the pin.  This elevates the knob slightly.  Then glue the pin into the small bead cap and through the cabinet door. Use bead glue that doesn’t frost the metal and glass parts.


Drawer Handles:
Brass wire – 20 gauge
Glass tube beads
Small 4mm Filligree ball bead
Small gold seed beads
Bead Glue

Make a 90 degree bend in the wire with the pliers.  Glue the beads in order like the photo and make another bend at the other end of the handle.  Poke guide holes in the cabinet with a pin the glue the handles in.

Cheater Flooring
The inlay design in the floor is made by using inlay strips used for decorating furniture.  These inlay strips can be found at woodworking stores (such as Woodcraft and Rockler) and also on Etsy.   The remainder of the floor was cut from thin veneer sheets - very thin wood backed with paper that can be cut with scissors.  This veneer can also be found at woodworking stores.  First trace out on the floor where the inlay design will go then fill in the areas around it with veneer.  Use wood glue.

Next month I will show photos of the completed kitchen and provide sources for the purchased items.  Thinking about the next project...

Saturday, August 31, 2019

LED kitchen cabinet lighting – those pesky lumps and wires!


Don’t you just love those LEDs?  The only problem is hiding the lumps and wires.  In today's post, I will describe what types of LED bulbs to use for cabinet lighting and how to hide the wiring.  First I have these tips working with LEDs:

LED Tips
  • Evan Designs – they have a great website that has lots of information about the types of LEDs and how to connect them.  They even have videos on how to put them in room boxes, how to splice, etc.
  • If ordering from Evan, always get extra long (14 inch) wires on your bulbs.  It only costs 10 cents extra per bulb and gives you a little more wiggle room when trying to hide lumps and wires.
  • For small projects (few bulbs), my advice would be to use the 3 volt bulbs and 3 volt button battery (or 2 x AAA battery pack OR 2 x AA battery pack, all are 3 Volt).  The reason is that there are no lumps on the 3 Volt bulb wires and they are easier to use in fixtures and hide behind backsplashes, etc. (chips - nano, pico, etc).  I used a 9 Volt battery in this project because the bulbs provided with the kit (which I used for the sconces) were that type.
All bulbs for this project were the types that work with 9 Volt batteries (5-13 Volt use range).  Bulbs sizes used for this project:

Sconces – 1.8 mm bulb
Inside cabinet (upper) – “nano” chip
Under cabinet – “chip” size
Other supplies: 9 Volt battery holder and battery, switch, extra wire and heat shrink tubing for splicing.

Hiding Wires
  1. Sconces – see my previous blog for how I made and installed these.  These 1.8mm bulbs have thicker wires that are harder to hide.  The sconce wires exited the back of the upper cabinets and were glued across the back to the center joining the other wires (upper and lower cabinet bulbs) and brought down behind the backsplash.
  2. Upper cabinet lights – I made a hole at the top back of the cabinet.  Before putting the bulb through I carved a channel down the back of the cabinet and removed just a couple layers of paper with my X-Acto.  This is where the wires would lay when the cabinet is glued to the wall.  Next, I pushed the bulb through the hole (the “nano” chip is almost smaller than the wires).  I glued the nano chip with Crafter’s Pick Ultimate glue to the inside center top of the cabinet.  I held it in place with small clamps (careful not to break the chip with too tight clamps).  When the bulb was set and dry, I laid the wires in the groove then covered it with a strip of index card.  I painted the red and green wires to match the inside cabinet.
    Carving a channel for wires


  3. Under cabinet lights – These were glued to the underside of the upper cabinets about halfway back (putting them too near the front makes them too visible).  I used a small spring clamp to hold the bulb while it dried. After the glue was dry the cabinets were glued to the wall.
  4. After hanging the upper cabinets, I had 3 sets of wires below each cabinet (sconce, upper cabinet light, under cabinet light).  The backsplash was going to cover the wires on the wall.  The backsplash was tile paper glued to thin cardboard.  I then glued “spacers” of 1/16th thick basswood to the back allowing a channel between the wood pieces for the wires.
    Backsplash with spaces for wires
  5. In the area behind the lower cabinets, I had to splice in additional length on some of the bulb wires so they would reach over to the battery holder.  In the photo above you can see the "lumps" in the wires just below the backsplash tile.
  6. I made my lower cabinet fronts removable for access to the battery.  There is a “toe kick” (strip of cardboard painted to match the base color of the cabinets).  The cabinet front is held in place by tension.  Foam core dividers prevent the front from pushing in too far.
  7. The battery pack has a small button.  I carved a hole in the side of the box (under the counter) so that just the button could be pulled outside.

  8. After the sink was glued in, the counter top was placed on and the false front pushed in place concealing the wires and battery.
I hope this post is helpful to someone wanting to use LEDs and hide wiring in a small project.  Next month – a few final details on this kitchen– custom made cabinet hardware and “cheater” flooring!

Saturday, August 10, 2019

Artichoke Sconces Tutorial – adapting battery type LED bulbs to sconce fixtures


This is the 5th in a series covering a mini kitchen project (going back to March, 2019).  This blog is a little more complicated than some of my other posts. I want so badly to use LEDs in my miniature lighting but some are so hard to fit through the typical tubing or beads that I want to make fixtures from. For these sconces I used some LEDs that were provided with the kitchen kit.
 
They are the 1.8mm LEDs wired for use with a 9 volt battery. They have a thick lump near the bulb that protects against high voltage. But this lump won’t fit through the brass tubing I wanted to use so I had to bend it. See photos further down for how I modified the bulb.

For this project, here is a photo of some of the supplies you will need:
 
  • polymer clay artichokes. You must be able to be cut through these (not resin or porcelain)
  • 3/32 outer diameter brass tubing, about 3 inches total
  • Sconce plate or base (I used a 3/8 inch square brass piece (JAR-JAF Miniatures Item #213) with a hole to accept the brass rod) 
  • Candle Cup (JAR-JAF Item 626 or 1579) 
  • Straight pin with a metal bulb on the end (dressmaker pin?) 
  • Aquarium type clear tubing for shades, 3/8 diam (about 1” piece) 
  • Fabric to cover the shade 
  • Index card 
  • X-Acto knife 
  • Razor saw and miter box (to cut brass tubing) 
  • LED light bulbs (Evan Designs) - I used the 1.8mm but smaller will work too.
  • Crafter’s Pick Ultimate glue 
  •  needle nose pliers
Instructions
  1. Cut into the artichoke from the center top make a slice approximately half way down. Hollow it out if necessary. You will need to be able to fit two brass rods in the center. I had to remove a bunch of cotton stuffing from mine
     
  2. “Drill” two holes in the artichoke (using the pointed tip of a #11 X-acto knife). One hole at the center top and one at about halfway down the side. The holes must fit the 3/32 brass rods. (only 1 hole shown in the photo).
  3. Sand a little off the very tip of the bulb to make the light spray out (fine emery board). Otherwise it will make a kind of ‘cone’ pattern on the wall or inside the cabinet where you mount it. Don’t sand too much or you will damage it! 
  4. Bend the bulb in a “U” shape being very careful not to cut the wires or break the plastic. I used a small needle nose pliers. It must fit into your shade so that the shade completely covers it (see also photos, step 14).
    Close UP of bent bulb - I painted it gold to disguise the black
  5. Test your bulb after you bend it (hold the wires to your battery connector wires - red to red and black to black!) 
  6. If desired (to make the light warmer) paint the bulb with a yellow-ish paint. 
  7. Shade – Find some tubing the size you need. I found clear tubing (Home Depot) 3/8 inch in diameter. Cut it to the length you need (mine was 3/8 inch). 
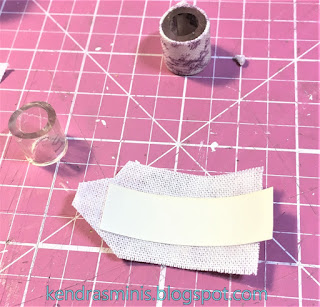
  8. Cut a strip of index card to cover the tube and overlap about 1/8 inch.  Cover index card with fabric clipping corners and allowing one angled flap. Fold fabric over on both long edges to cover the card. Don’t fold fabric over the short edges or it will be very thick.

  9. Wrap the shade around the tubing and overlap the fabric at the back. Try to keep it neat with no frayed strings. 
  10. Note: I use Crafter’s Pick Ultimate glue for the following steps. It seems to hold pretty quickly and grabs well. Depending on your sconce, size of your artichoke, and how much tubing you want to protrude through the wall, decide how long each ‘leg’ of brass tubing ‘elbow’ should be. Cut the brass tubing into two pieces using a razor saw and miter box. 
  11. Thread the bent bulb down through the top piece of tubing then through the other piece. Leaving a little wire showing between the two, bend them at right angles. TRY NOT TO CUT THE WIRE WITH THE EDGE OF THE TUBE.
  12. The two pieces will be secured at a right angle in the middle of the artichoke and held with glue. 
  13. After the brass tubes are glued inside the artichoke, glue the brass plate to the artichoke. Try to keep the plate parallel to the upright tube and hold it until it is somewhat set. 
  14. When the tubes are dry, glue the lamp shade over the bulb. It will not get hot since it is an LED so no worry about the glue melting.
  15.  One more thing I did was to make a finial for the bottom of the artichoke. I used a pin (painted the pin head gold) stuck through a candle cup finding and up into the bottom of the artichoke. 
  16. Attaching Sconce to Cabinet: Since the cabinets were cardboard, it was not hard to poke holes where I wanted to mount the sconces. I brought the wires to the inside of the cabinet then cut another exit hole through to the back of the cabinet and pushed them through to the back.  I glued them against the cabinet side using a piece of scrap wood and small clamps to hold wires. 
  17. I painted the wires to match the inside of the cabinets. (in this photo you can also see the very tiny LED glued to the inside top of the cabinet for interior cabinet lights – next post!)
     
    Finished sconce mounted on side of cabinet.
  18. Next time I will show how the wires are combined with the other lights (under cabinet in inside cabinet).  Also how I hid the battery and switch.
  I hope this post will give someone the inspiration to try to adapt LED lights to mini fixtures.